David Mearns – Search Director, The Finding Sydney Foundation
Immediately after posting our search diary yesterday we were forced to recover the ROV because of an alarm telling us it was low on oil that is used to fill an important transformer housing. This recovery also allowed us the opportunity to repair the problem we had yesterday which kept the ROV frustratingly shackled into its protective garage. This made taking good images of HMAS Sydney virtually impossible, and although we had just enough decent pictures to release yesterday I was fully expecting the imagery we collected today to be much, much better. Fortunately, I was not to be disappointed.
In all I took over 340 still pictures in a single 12 hour dive today and the images are remarkable for both their stunning clarity and their brutal documentation of the punishment suffered by Sydney and her crew. I have studied many historical accounts of the battle between Sydney and Kormoran but none of these could fully prepare me for the enormous damage withstood by Sydney. At the end of the dive I paused to reflect on the horror experienced by Sydney’s officers and crew as they fought to save themselves and their ship.
Of the many images of Sydney’s wreck two struck me the most. The first was of a cluster of large calibre shell hits on Sydney’s starboard side. Each 5.9-inch shell impacted against Sydney’s four-inch thick belt of armour and hull plate that was protecting her vital engine room and boiler spaces. Whilst the shells did not fully penetrate the hull the damage and carnage they would have wreaked on the other side would have been enormous. The truly amazing aspect of this picture (shown below), however, is that each of the 4 shells - undoubtedly fired separately, but by the same gun on Kormoran - all hit within a cluster only 20-foot high. This image illustrates with terrifying reality the rapidity and deadly precision of the German gunnery.
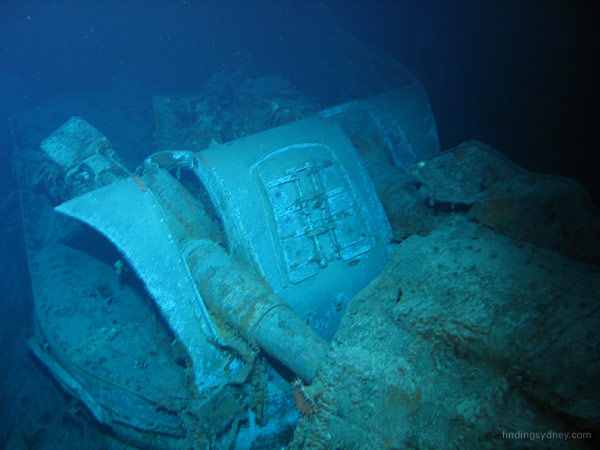
The second image speaks volumes for the bravery of Sydney’s own gunners closed up in “X” turret. The men in this turret - the forward of Sydney’s two stern guns – have been credited by their German adversaries for firing the shells that ultimately led to Kormoran’s demise. Because Sydney’s bridge and director control tower were destroyed at the start of the battle it is now clear that the men in “X” turret must have been shooting independently in local control. Our pictures of “X” turret not only show it pointing forward frozen in its final shooting position but they also reveal the turret’s two forward hatches swung wide open, possibly to allow better aiming and firing by the gunners inside. Despite their heroics, the men in “X” turret sadly met a similar fate to those in “A” and “B” as evident by the shell hits on its base.
Our pictures also reveal a serious amount of damage to Sydney’s stern which I believe helps to explain the final sinking scenario. Based on the buckling of the stern and the complete collapse of the main deck aft of “Y” turret there can be little doubt that Sydney hit the seabed stern first and that this damage resulted from the violent impact that ensued. I further believe that the triggering mechanism for Sydney to sink by the stern was the moment her bow broke away from the hull at the surface. The next important task for us on our upcoming dive is to locate Sydney’s bow, the position and condition of which should tell us far more about the sinking.
Glenys McDonald - Director, The Finding Sydney Foundation (Observer)
It has been an incredible day, but a very sobering one, as we recorded excellent video and still images of the wreck of HMAS Sydney.
The ROV re-entered the water at 7am and went to depth. This time we were able to fly free of the garage and therefore could go above the vessel and zoom in and down. We examined in detail the port side of the ship and John and I took copious detailed notes. The quality of the material is excellent.
As the day unfolded the extent of the damage to our beloved ship was alarmingly clear and it may be distressing for some families. In addition, more damage was sustained when the stern impacted with the sea floor. After the detailed examination of the bow and port side, we inspected the closest pieces of debris in the adjacent debris field.
We then examined the starboard side. Although I knew that Sydney’s starboard side came under Kormoran fire as she turned as if to ram and limped off to the south east, I was horrified at the extent of the shell hits to this side of the vessel. Several areas of the ship also bore the scars of terrible fire damage. The damage we assessed matches closely the description given by the Germans. Their concentrated firepower was incredibly destructive and accurate.
Amongst this terrible destruction some items stood out proud and alone – a capstan, two bollards painted with stripes, a kedge anchor. It was a very emotional and long day: so much destruction, so little chance of survival. HMAS Sydney gave up many of her secrets today, may she now rest in peace.
John Perryman – Senior Naval Historian (Observer)
Following the success of yesterday’s initial ROV reconnaissance on HMAS Sydney (II) we determined that today we would re-visit the wreck and conduct a more detailed survey along the length and breadth of both her port and starboard sides.
At 09:15 the wreck was sighted and the inspection began at the forward end of Sydney’s port side. Today we were more interested in noting details such as specific damage and what effect this may have had on crippling the cruiser.
With the ROV now free of its garage and operating independently, we were soon unraveling some of Sydney’s long held secrets. During the morning we found that ‘A’ turret had received two hits in a similar position to where the front of ‘B’ turret had been struck, leaving two scars, low between its twin gun barrels. The ROV was then maneuvered around ‘A’ turret, which had lost its entire top and right-hand-side of the gun housing, leaving both 6-inch gun breeches and the rear of the turret exposed. A closer inspection of ‘B’ turret revealed that it had received a further hit in the base of the barbette on which it rested. These hits were the first of many viewed by us throughout the day and began to give us an insight to the accuracy of the Kormoran’s gunners.
Further evidence of the fierceness of the engagement came when we returned to the bridge and forward superstructure. The base of the Director Control Tower had received a direct hit which had punched through it from the starboard side and exited through the port side leaving a gaping hole. The compass platform and bridge was a shambles and the forward screen below it had partially collapsed and was pushed back at an angle of about twenty degrees. On viewing this level of destruction, a hushed silence fell over the survey room as we continued to maneuver the ROV towards the rear of the ship.
As we made our way aft, down the port side, the situation was the same. There were multiple hits on the ship’s side as well as on most of the structures mounted on her main deck. It seems almost impossible that any of Sydney’s wooden boats could have survived this onslaught and it almost certainly explains the shrapnel studded Carley float now on display at the Australian War Memorial, which was one of only a few items ever recovered from Sydney.
When we came to ‘X’ turret which, according to the Kormoran survivors had fought on valiantly and dealt the German raider a mortal blow, we were amazed to find that as with ‘A’ and ‘B’ turrets she too had received two well placed shell hits in the front of her gun housing low between her gun barrels which were fully depressed. Draped over the top of ‘Y’ turret is what we believe to be the remnants of the after funnel.
Approaching the stern it became apparent that the main deck had collapsed, sloping down to form a bowl-like feature as it met the extremity of the aft end of the ship. We then maneuvered around the stern and began our inspection of the starboard side.
Somewhat surprisingly the starboard side of Sydney had received greater punishment than the port side, which had been the side initially engaged. There was evidence of consistent shell hits visible along the entire ships side, ranging from as high as the lip of the main deck to as low as the boot-topping which was level with the water line.
As with the port side, Sydney’s 21-inch torpedo tubes were missing leaving only the ring gear, which once traversed them, remaining. Below this mounting were four closely grouped shell hits visible immediately below the main deck.
As we made our way along the starboard side, we observed that the forward 4-inch high angle gun was missing as were several of the 4-inch ready-use ammunition lockers.
Soon we were back in the mid ships area carefully negotiating our way around the wrecked ships aircraft crane before coming upon the starboard side of the forward superstructure. Again it was clear that this area had been severely pounded, with gun platforms twisted, fittings gone and multiple shell hits apparent. After a full day, our survey concluded at ‘B’ and ‘A’ gun turrets at 20:15 in the evening.
One can only guess the desperateness of Sydney’s situation following such severe punishment. That some of Sydney’s crew were observed by their German opponents to be fighting to the last is no small wonder and a testimony to their courage and determination to press on. While the survey told us much, for all of us it was a sobering insight into Sydney’s final hours.
Dr. Michael (Mac) McCarthy – Curator of Maritime Archaeology, WA Museum (Observer)
On 19 March soon after the wrecks were found and after they had been declared historic (and a restricted zone was cast around them), I received a phone call from Patrick Flynn inviting me to join the search team for the ROV inspection phase. Having been officially involved with HMAS Sydney and HSK Kormoran since 1981, I was naturally keen to accept.
After advising my Director of this development and of the fact that the Finding Sydney Foundation was in the process of drafting a request for permission to return to the sites, approval was received. Readers may be surprised to know that even Museum staff cannot work historic wrecks or enter restricted historic wreck zones without a permit nowadays!
Terry Bailey, the Commonwealth Delegate of Minister Peter Garrett, then faxed a permit to the FSF allowing Geosounder entry into the restricted zones. The permit, while allowing non-disturbance recording, prohibits contact with the wrecks and associated relics. Additionally the wrecks, surrounds and relics are to be respected as ‘a gravesite’ and not be disturbed in any way. This same non-disturbance brief was set back in 1991 when a search of the area specified by the Kormoran’s captain was first mooted.
The permit also specified that a record of the activities was to be kept and provided to the Minister’s delegate. From there it is to enter the public domain. All notes, reports, track plots, film, sonar and multi-beam images from the search, finding and inspection phases will appear. Of special interest will be the underwater footage from the ROV. This record is continuously backed up and updated with time and sequential number by David Mearns’ nightshift offsider Robert Bruinsma.
Today the ROV, expertly flown by DOF Subsea’s Dave Norton and Bruce Berrman (supported by Kaamil Douglas, Dean Glazebrook, Simon Hall, Brett Murray and Peter Skinner), showed each shell hole and each battered and twisted feature along the hull and on the deck in alarming detail. Reaction as the damage unfolded became more and more apparent on each pass and was one of great sadness.
Above Photograph: “A” turret, with its gun housing destroyed and with the foredeck rent back over its twin gun barrels.
Above Photograph: Sydney’s badly damaged compass platform, bridge and remnants of the base of the Director Control Tower.
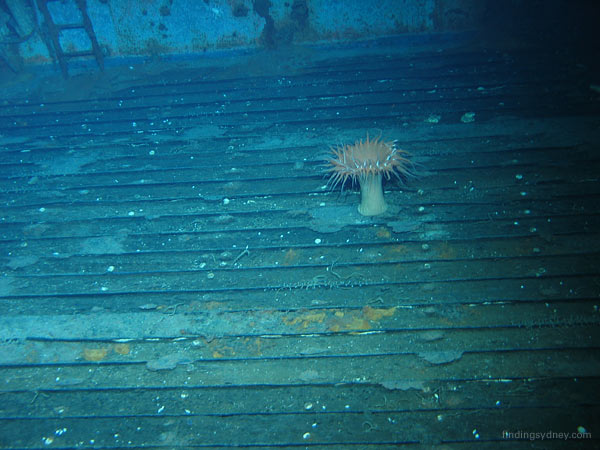
Above Photograph: A deep sea anemone adorns Sydney’s main deck.
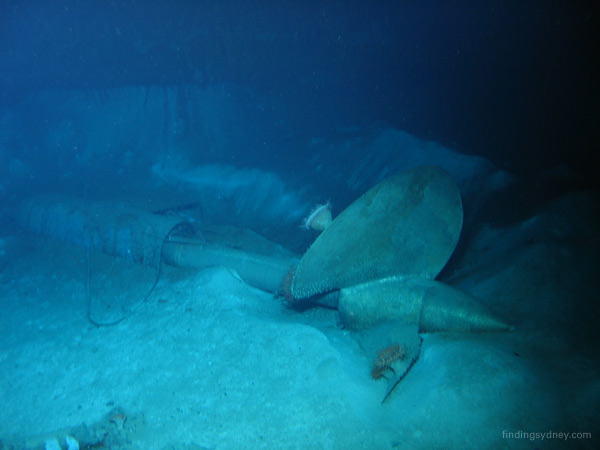
Above Photograph: One of Sydney’s port propellers and shafts dislocated from its normal position against the hull.
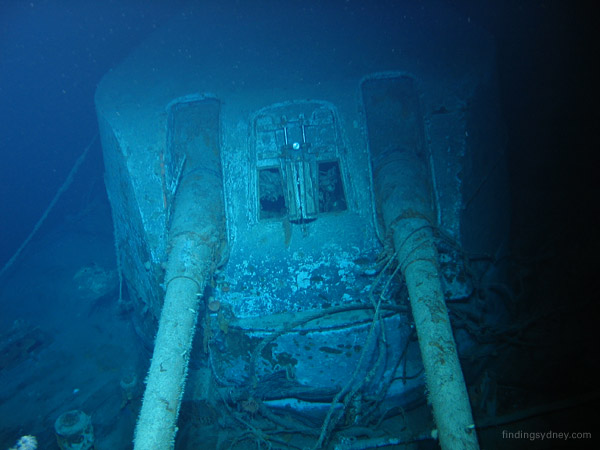
Above Photograph: The front of the gun housing of “X” turret, credited by the Germans with inflicting the mortal blow on Kormoran.
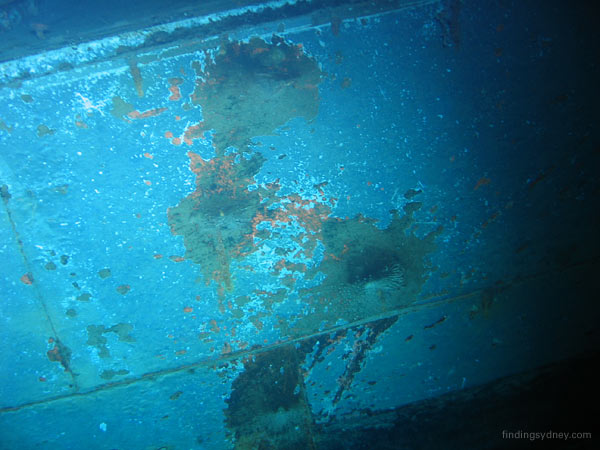
Above Photograph: This cluster of four 5.9-inch shell hits within a line 20-feet high clearly demonstrates the deadly precision of the German gunnery.
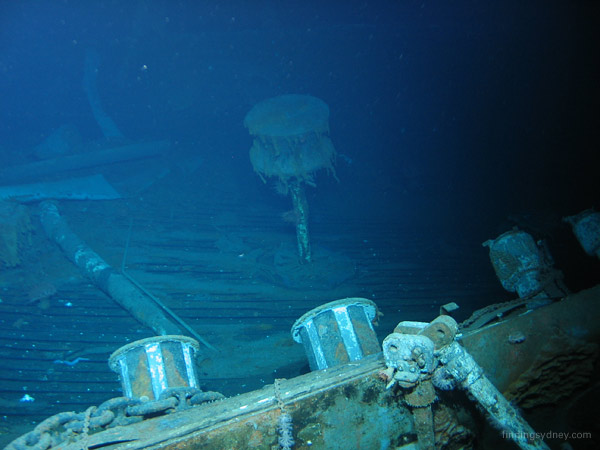
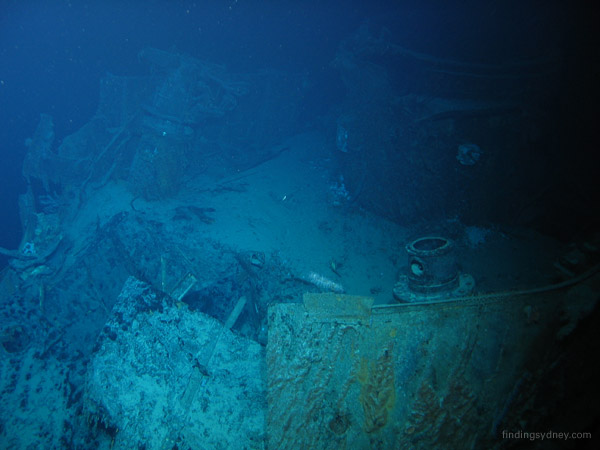
Above Photograph: A capstan in the centre of Sydney’s stern sits elevated above the collapsed main deck with the two bollards in the foreground folded inward because of the same collapse.
Photo Gallery Slideshow available at http://www.findingsydney.com/gallery.asp
IMPORTANT NOTICE: The Material (including photographs) available in the "Press Room" section of this Website may be used/reproduced unaltered by your organisation (unless stated otherwise within the content description) subject to the terms and conditions set out in the Legal Section AND any Material (including photographs) which you use/reproduce must credit the source as "The Finding Sydney Foundation" and, as an option, you may also link the source statement with the website address http://www.findingsydney.com/.
Photographer: David Mearns